

Long Time No See
/Firstly, let me apologize for my absence and neglect of this blog. Excuses abound, even a few good ones.
What have we been up to? I can assure you, quite a lot. The completion of interior planking including the installation of bilge stringers, clamps and shelves. The installation of the mast step and subsequent forward structure. The completion of the engine beds. Exterior longitudinals such as the whales, garboard strakes, and the beginning of the broad strake. The build out of the deck framing including hanging and lodging knees. So much more…
You can expect that there will be a handful of retroactive posts to guide you through to the present. For now, we will take a look at a part of the project that occupied the better part of three months of my own time, that is, the build of our spars.

Rigger, Bob Downes, begins bringing the sprit yard from cant to a tapered squared spar with a circular saw
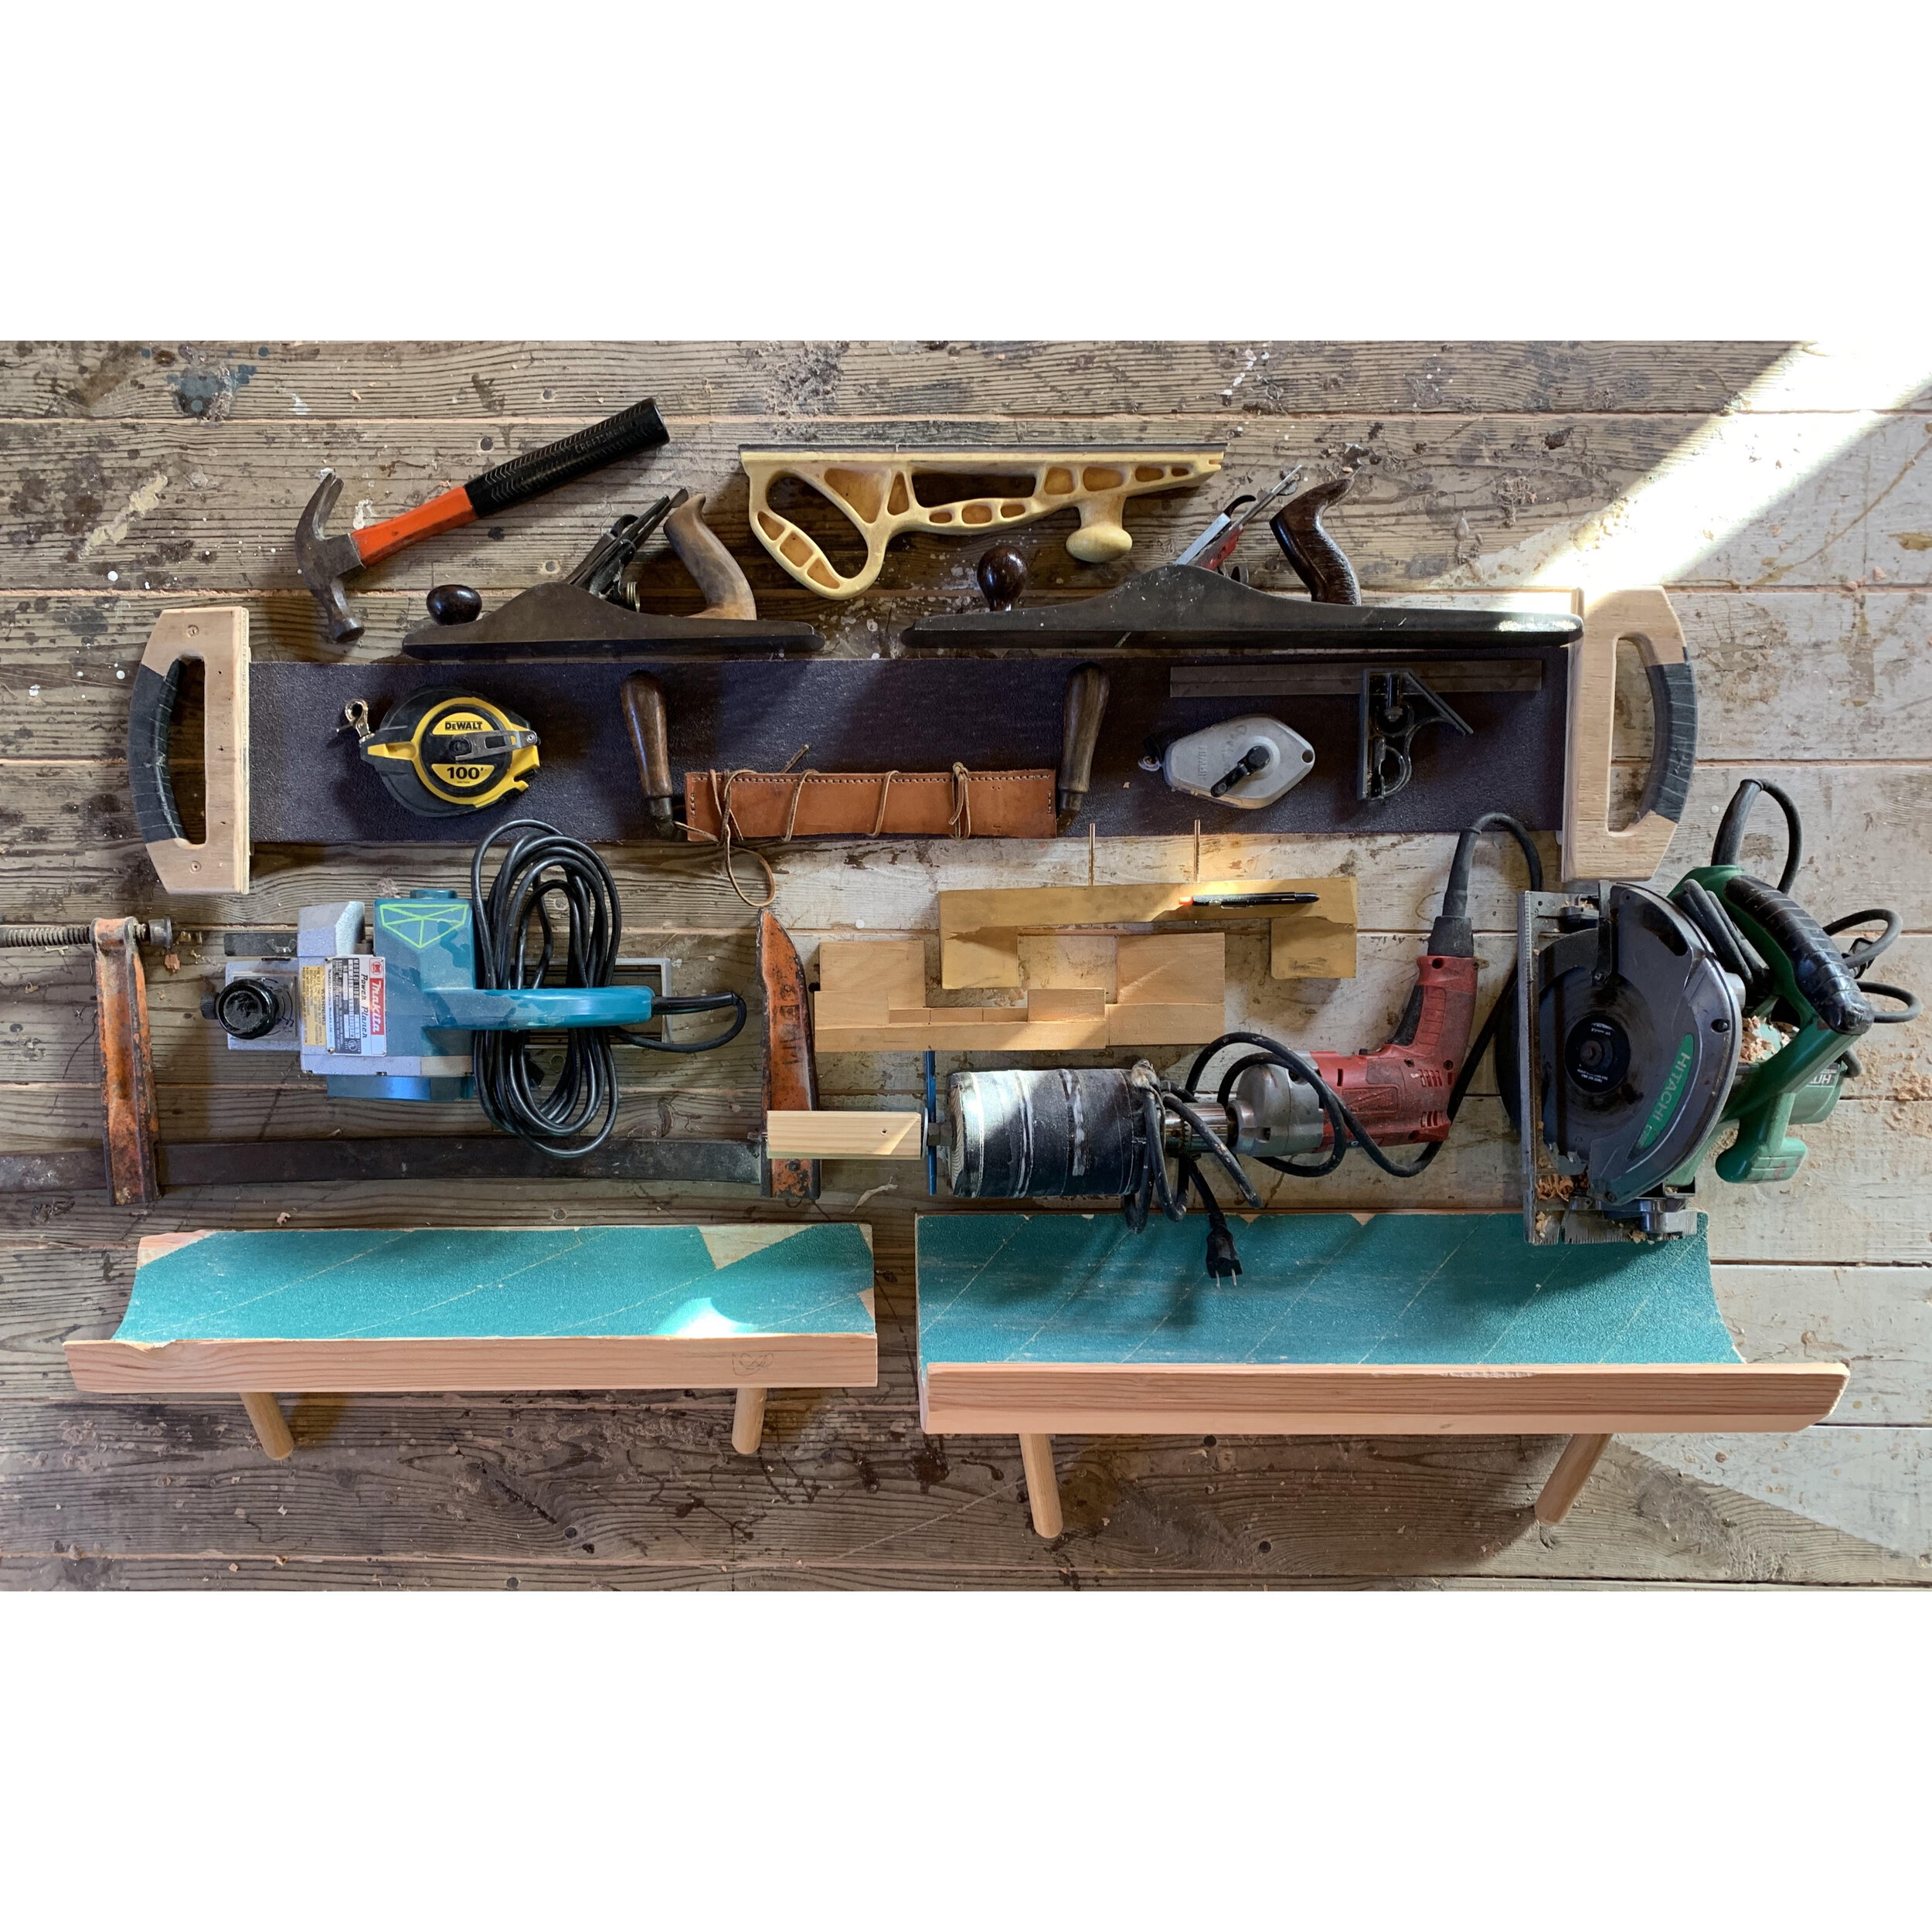
A handful of spar building tools including a jack plane, jointer plan, power plane, drill powered reverse belt sander, circular saw, and spar sanding planes made on the table saw using cove calculations.
I’d like to take this opportunity to refocus on some fundamentals of woodworking and likely on craft more generally. Before this, some basic definitions for the uninitiated.
A spar allows for the spreading and tensioning of a length of sail. Every sail is supported by either a spar or a stay (which may be an integrated stay in the case of a flying sail). In the case of a mast, we typically see the spreading of the luff or forward edge of the sail. On a yard we see the spreading of the head or foot of the sail. On a gaff, the spreading of the head and on a boom, the spreading of the foot of a triangular or quadrilateral sail. Sometimes spars provide an extension of the vessel to conveniently place the lower corner of a sail or to lead running rigging, this is generally the case with bowsprits and boomkins respectively. We also use spars for cargo purposes or other utility purposes in the case of a buyboats mast and boom or in the case of the outriggers on a fishing vessel. In its simplest function we rig a mast for no purpose other than to mount a light or raise a flag. Spars are typically long and thin, and can be made of solid wood, laminated wood, aluminum, carbon fiber; or some other stable, light, and strong material. Sometimes it is ideal for a spar to be quite whispy and flexible and sometimes very stiff and rigid depending on the nature of the vessel, how it is rigged, where its sailing, and in what conditions. Spars can be triangular in their cross section, square, octagonal, round, or oval shaped. Often times spars transition from square to round or otherwise. Typically we see the tapering of a spar as we make our way outboard or up.
The Dove has solid wood spars with a handful of laminated spars. A lamination is performed either for reasons of decreasing weight or to better utilize resources. If your material consists of a solid tree of mid grade quality, you may get away with shaping a solid spar filled with knots, checks, and wind twist that ends up lasting quite a long time and performing sufficiently enough. However, if you have access to long quarter sawn but undersized cants, you have the option of gluing them up square to achieve a spar with perfect vertical grain all the way around, and so long as your glue process is controlled and careful you will have a spar that is more stable, stronger, and most likely longer lasting than a solid spar would ever be. This particular type of simple glue up, as well as a stack lamination glue up, may even prove to be more economical. Common glue up methods and styles that you will hear of include birdsmouth, box, square, and stack laminations.
In all cases, solid or glued, we abide by the general rules of woodworking as I have come to know them and will take the opportunity to lay them down now.
1) Know what you’re doing. Work from plans or specs. This is craft not art- one of the positive descriptions we can give to craft is that the finished product exists in a 1 to 1 correspondence with the plans. We have discussed this in concept in our lofting post. There is no room for improvisation in ends only in means.
2) Select proper material and study your material. In spar material we should be aware of USCG inspection standards- is there a check that has a depth which exceeds 30% of the diameter of the spar? Are there any sap pockets, cracks, excessively large knots, inclusions?
3) Carefully measure and mark your material. Some carpenters say no pens for marking. My teacher said the only marking that matters is a clean and clearly visible accurate (thin) marking. To him, this meant using marking knives, a sharp pencil, or a ball point pen.
3a) stabilize the material and gain control of your environment. Set up lighting and shelter from wind, rain, and sun. Build out stout saw horses or a robust work bench with adequate clamping of the material.
4) Cut close to the line with an appropriate tool. Often we begin our process with the woodmizer band mill, then to a beam saw or circular saw.
5) Cut right to the line with an appropriate tool. In spar construction this means a sharp power plane followed by a joining plane or jack plane.
5a) for spars we define our limits as not to cut into our specified diameters- we do so by marking the faces of a 16 sided spar with crayon along the middle
5b) recognize that the sanding process with take about 1/3 of the total completion time. Be patient and careful, a fair and straight spar in the 16 sided phase can quickly become lumpy wresting you of any premature sense of pride in your craftsmanship.

Shipwright Matt Hommel using the beam saw on the topmast

A jack plane bringing the square glued lower yard to 16 sides
Our process for spar construction is as follows:
1) establish one straight and flat face using the band mill
2) layout and cut the taper into the spar, establishing flat perpendicular sides to work off of using the circular saw
3) bring your tapered spar to perfectly square using planes and measuring squares right down to your line- this is absolutely essential to subsequent ease of process. If you leave a fat line or meat away from the line you will later find yourself chasing your tail with unequal widths of 8 or 16 sided facets causing pain in your head and reduced self confidence.
4) Layout for 8 sides using a spar gauge that is accurate. To test for accuracy mark a length of spar near the taper for 4 feet or so, drag the gauge in the opposite direction (the marking should be the same). Now flip the gauge around 180 degrees and repeat. You should not have multiple lines close together on each side of the spar but one thick line due to marking over 4 times. If you are building spars across a range of diameter you will need to build three or four gauges. A large gauge on a small spar will not be accurate.
5) cut your 8 sided spar using a circular saw set at 45 degrees or using a power plane. After all corners are cut off mark down to your line with a jointer or jack plane.
6) mark the center of your facets with a crayon and draw a spiral around the spar every 4 or 5 feet. Label each facet with odd numbers 1,3,5,7,9,11,13,15 (good luck interpreting this step through a written description alone). Now plane down to 16 sides splitting the spiral evenly during the creation of the 16 facets. You can now fill in the unlabeled dashed spiral line with the even numbered facets- 2,4,6,8,10,12,14,16.
7) mark the center of your 16 facets with crayon and plane by hand down to 32 sides.
8) sand using the reverse belt sander or a long sanding strap by hand until your crayon lines along the facets begin to disappear.
9) switch to a method of sanding that will produce a more fair product such as a sanding long board or a custom concave longboard such as the ones that we built on the table saw. Focus on sanding with the grain to eliminate crossgrain sanding marks. Work up in grit to 180.
10) cut off your ends, use a router to round over wherever desired, and coat with whatever finish is appropriate to the spars intended use and aesthetic.

lumber crayon on 16 facets to control the process and not over plane or over sand. You can see toward to bottom of the image areas where the spirals are drawn and split while bringing the spar to 16 sides.

Our mizzen mast with tenon and a light coating of penetrol and pine tar (later to be slushed)

The 8 spars completed in the fall- Top yard, sprit yard, lower yard, mizzen yard, mizzen mast, main top mast, outlicker/ boomkin, mizzen flag mast.
Till next time
SH